Woodworker's Journal 2004 Summer, страница 20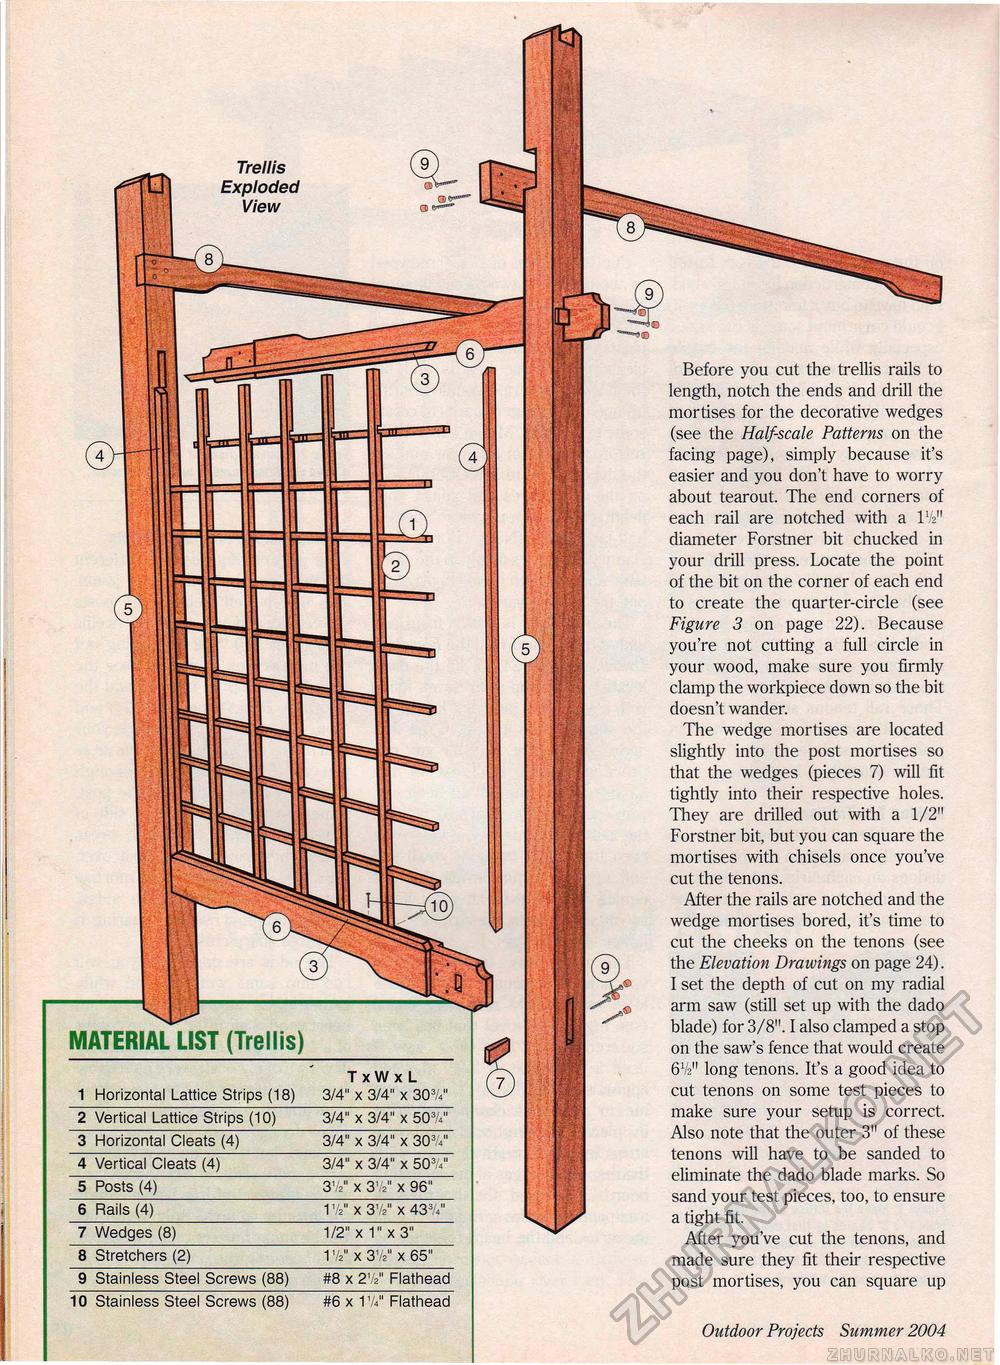
MATERIAL LIST (Trellis)
Before you cut the trellis rails to length, notch the ends and drill the mortises for the decorative wedges (see the Half-scale Patterns on the facing page), simply because it's easier and you don't have to worry about tearout. The end corners of each rail are notched with a IV2" diameter Forstner bit chucked in your drill press. Locate the point of the bit on the corner of each end to create the quarter-circle (see Figure 3 on page 22). Because you're not cutting a full circle in your wood, make sure you firmly clamp the workpiece down so the bit doesn't wander. The wedge mortises are located slightly into the post mortises so that the wedges (pieces 7) will fit tightly into their respective holes. They are drilled out with a 1/2" Forstner bit, but you can square the mortises with chisels once you've cut the tenons. After the rails are notched and the wedge mortises bored, it's time to cut the cheeks on the tenons (see the Elevation Drawings on page 24). I set the depth of cut on my radial arm saw (still set up with the dado blade) for 3/8". I also clamped a stop on the saw's fence that would create 6V2m long tenons. It's a good idea to cut tenons on some test pieces to make sure your setup is correct. Also note that the outer 3" of these tenons will have to be sanded to eliminate the dado blade marks. So sand your test pieces, too, to ensure a tight fit. After you've cut the tenons, and made sure they fit their respective post mortises, you can square up 20 Outdoor Projects Summer 2004 £ |


